

- Python
- TypeScript
- Java
- Kotlin
- C#
- Ruby
- Rust
你可以在此处找到本教程的完整代码。将 这个 客户端将: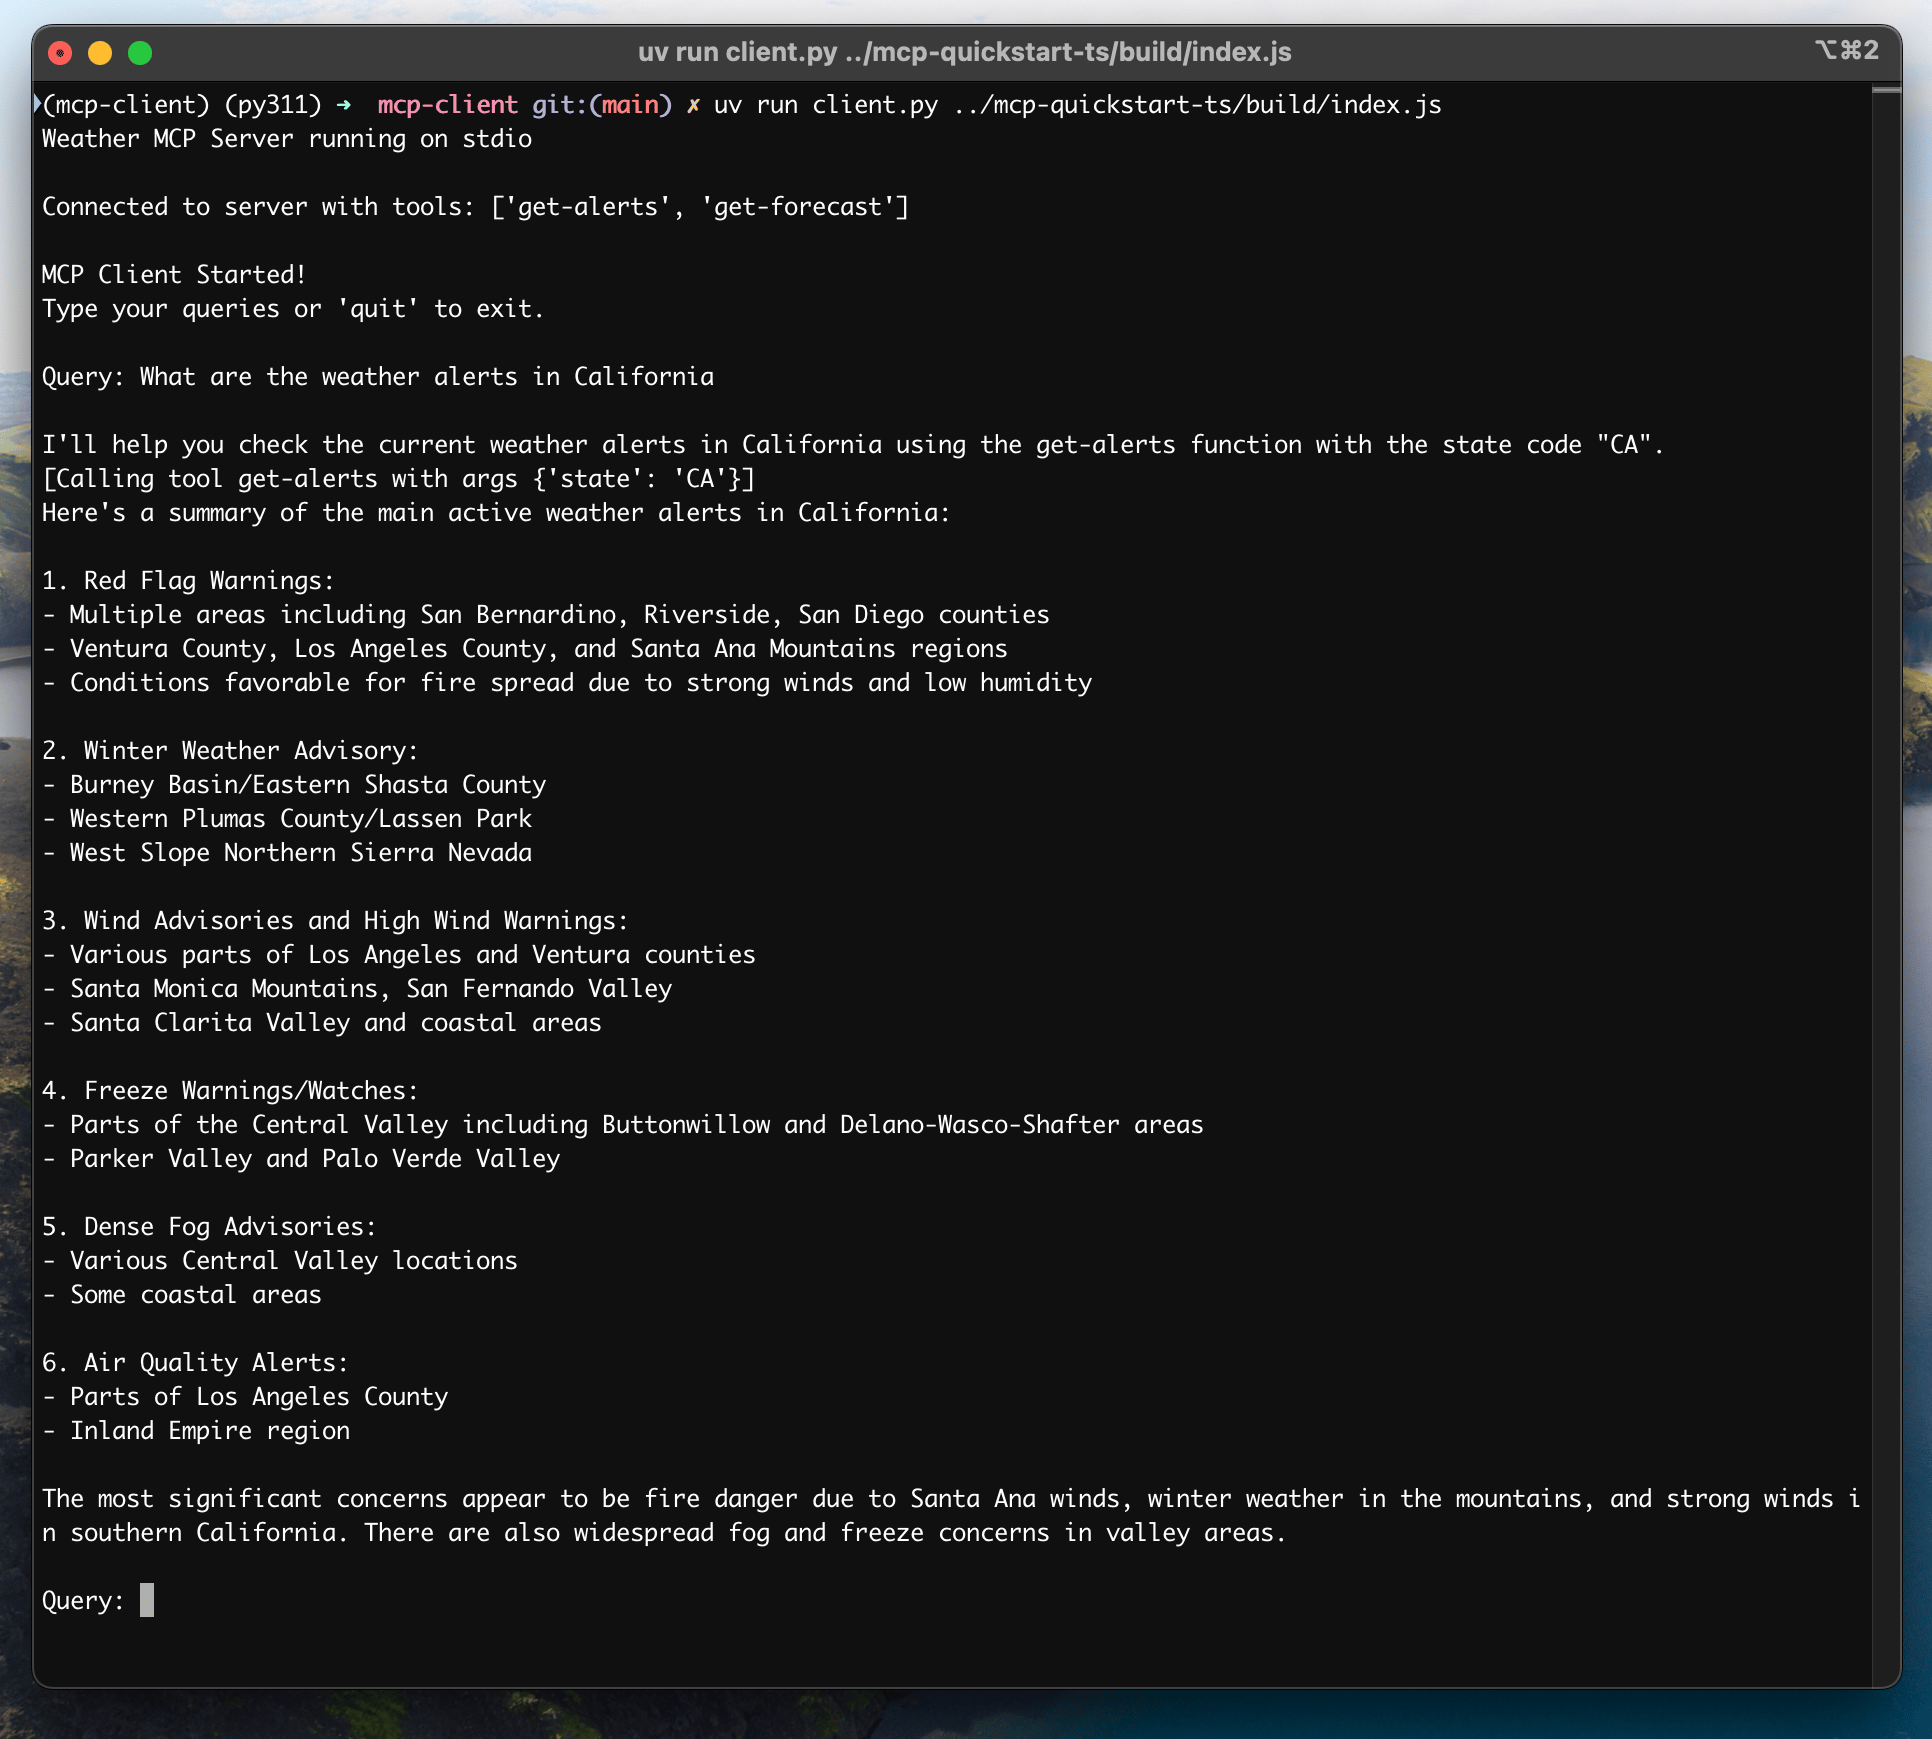
系统要求
开始之前,请确保你的系统满足以下要求:- Mac 或 Windows 计算机
- 已安装最新版本的 Python
- 已安装最新版本的
uv - 必须使用 Python MCP SDK 2.0.0 或更高版本
设置环境
首先,使用uv 创建一个新的 Python 项目:# Create project directory
uv init mcp-client
cd mcp-client
# Create virtual environment
uv venv
# Activate virtual environment
source .venv/bin/activate
# Install required packages
uv add mcp anthropic python-dotenv
# Remove boilerplate files
rm main.py
# Create our main file
touch client.py
# Create project directory
uv init mcp-client
cd mcp-client

# Create virtual environment
uv venv

# Activate virtual environment
.venv\Scripts\activate

# Install required packages
uv add mcp anthropic python-dotenv

# Remove boilerplate files
del main.py

# Create our main file
new-item client.py
设置 API 密钥
你需要从 Anthropic Console 获取 Anthropic API 密钥。创建一个.env 文件来存储它:echo "ANTHROPIC_API_KEY=your-api-key-goes-here" > .env
.env 添加到 .gitignore:echo ".env" >> .gitignore
请务必妥善保管你的
ANTHROPIC_API_KEY!创建客户端
导入和设置
首先,设置导入项以及文件其余部分共享的内容:import asyncio
import sys
from mcp import Client, StdioServerParameters
from mcp.client.stdio import stdio_client
from mcp_types import TextContent
from anthropic import Anthropic
from dotenv import load_dotenv
load_dotenv() # load environment variables from .env
MODEL = "claude-opus-5"
anthropic = Anthropic()
Client 是你的程序与服务器通信时使用的唯一对象。列出工具、调用工具、读取资源:这些操作都对应于它的一个方法。服务器连接管理
接下来,我们确定针对给定服务器脚本需要启动哪个进程:def server_params(server_script_path: str) -> StdioServerParameters:
"""Describe the subprocess that runs an MCP server
Args:
server_script_path: Path to the server script (.py or .js)
"""
if server_script_path.endswith(".py"):
command = "python"
elif server_script_path.endswith(".js"):
command = "node"
else:
raise ValueError("Server script must be a .py or .js file")
return StdioServerParameters(command=command, args=[server_script_path])
StdioServerParameters 是配置,而不是连接。stdio_client() 会将其转换为 stdio 传输,而 Client 会在进入其 async with 代码块时打开该传输。我们将在 main() 中完成这两步。查询处理逻辑
现在,添加处理查询和处理工具调用的核心功能:async def process_query(client: Client, query: str) -> str:
"""Process a query using Claude and available tools"""
messages = [
{
"role": "user",
"content": query
}
]
tool_list = await client.list_tools()
available_tools = [{
"name": tool.name,
"description": tool.description,
"input_schema": tool.input_schema
} for tool in tool_list.tools]
# Initial Claude API call
response = anthropic.messages.create(
model=MODEL,
max_tokens=1000,
messages=messages,
tools=available_tools
)
# Process response and handle tool calls
final_text = []
tool_results = []
for content in response.content:
if content.type == 'text':
final_text.append(content.text)
elif content.type == 'tool_use':
tool_name = content.name
tool_args = content.input
# Execute tool call
result = await client.call_tool(tool_name, tool_args)
final_text.append(f"[Calling tool {tool_name} with args {tool_args}]")
tool_results.append({
"type": "tool_result",
"tool_use_id": content.id,
"content": "\n".join(
block.text
for block in result.content
if isinstance(block, TextContent)
),
"is_error": result.is_error
})
if tool_results:
messages.append({"role": "assistant", "content": response.content})
messages.append({"role": "user", "content": tool_results})
# Get next response from Claude
response = anthropic.messages.create(
model=MODEL,
max_tokens=1000,
messages=messages,
tools=available_tools
)
for content in response.content:
if content.type == 'text':
final_text.append(content.text)
return "\n".join(final_text)
call_tool 返回一个 CallToolResult。它的 content 是一个代码块列表,因此我们需要先将其缩小到 TextContent,然后再读取 .text。工具发生异常时不会在此处抛出异常:它会返回设置了 is_error 的结果,传递该标志后,Claude 就能读取消息并尝试其他操作。交互式聊天界面
现在添加聊天循环:async def chat_loop(client: Client) -> None:
"""Run an interactive chat loop"""
print("\nMCP Client Started!")
print("Type your queries or 'quit' to exit.")
while True:
try:
query = (await asyncio.to_thread(input, "\nQuery: ")).strip()
except EOFError:
break
if query.lower() == 'quit':
break
try:
response = await process_query(client, query)
print("\n" + response)
except Exception as e:
print(f"\nError: {e}")
input() 会阻塞,因此它会在工作线程上运行。这样可以让事件循环在你输入时继续处理连接。主入口
最后,添加主执行逻辑:async def main() -> None:
if len(sys.argv) < 2:
print("Usage: python client.py <path_to_server_script>")
sys.exit(1)
async with Client(stdio_client(server_params(sys.argv[1]))) as client:
tool_list = await client.list_tools()
tool_names = [tool.name for tool in tool_list.tools]
print("\nConnected to server with tools:", tool_names)
await chat_loop(client)
if __name__ == "__main__":
asyncio.run(main())
async with 包含了完整的连接生命周期。进入它会启动服务器并与服务器协商协议版本;离开它会断开连接并关闭子进程。无需手动关闭任何内容。你可以在此处找到完整的 client.py 文件。关键组件说明
1. 客户端初始化
- 单个
Client负责维护连接,而async with包含其完整生命周期 - 无需调用连接/关闭方法,也无需在之后进行清理
- 配置 Anthropic 客户端以进行 Claude 交互
2. 服务器连接
- 同时支持 Python 和 Node.js 服务器
- 验证服务器脚本类型
- 将服务器作为子进程启动,并通过 stdio 与其通信
- 连接打开后列出可用工具
3. 查询处理
- 维护对话上下文
- 处理 Claude 的响应和工具调用
- 管理 Claude 与工具之间的消息流
- 将结果组合成连贯的响应
4. 交互式界面
- 提供简单的命令行界面
- 处理用户输入并显示响应
- 包含基本的错误处理
- 支持正常退出
5. 资源管理
- 离开
async with代码块会断开连接并关闭服务器子进程 - 查询失败时会报告错误,但不会结束会话
- 输入
quit或关闭标准输入后会正常退出
常见自定义点
-
工具处理
- 修改
process_query()以处理特定工具类型 - 为工具调用添加自定义错误处理
- 实现针对特定工具的响应格式化
- 修改
-
响应处理
- 自定义工具结果的格式化方式
- 添加响应过滤或转换
- 实现自定义日志记录
-
用户界面
- 添加 GUI 或 Web 界面
- 实现丰富的控制台输出
- 添加命令历史或自动补全
运行客户端
要让客户端与任意 MCP 服务器一起运行:uv run client.py path/to/server.py # python server
uv run client.py path/to/build/index.js # node server
如果你正在继续完成服务器快速入门中的天气教程,你的命令可能类似于:
python client.py .../quickstart-resources/weather-server-python/weather.py- 连接到指定的服务器
- 列出可用工具
- 启动交互式聊天会话,你可以在其中:
- 输入查询
- 查看工具执行情况
- 获取 Claude 的响应
工作原理
提交查询时:- 客户端从服务器获取可用工具列表
- 将你的查询连同工具描述一起发送给 Claude
- Claude 决定使用哪些工具(如果有)
- 客户端通过服务器执行请求的工具调用
- 将结果发送回 Claude
- Claude 提供自然语言响应
- 将响应显示给你
最佳实践
-
错误处理
- 检查
result.is_error,而不是期待失败的工具抛出异常 - 提供有意义的错误消息
- 正确处理连接问题
- 检查
-
资源管理
- 让
async with代码块负责连接 - 在需要服务器期间保持连接打开
- 处理服务器断开连接的情况
- 让
-
安全性
- 将 API 密钥安全地存储在
.env中 - 验证服务器响应
- 谨慎处理工具权限
- 将 API 密钥安全地存储在
-
工具名称
- 可以根据此处指定的格式验证工具名称
- 如果工具名称符合指定格式,则 MCP 客户端不应因验证而失败
故障排除
服务器路径问题
- 仔细检查服务器脚本路径是否正确
- 如果相对路径不起作用,请使用绝对路径
- Windows 用户请确保在路径中使用正斜杠(/)或转义反斜杠(\)
- 确认服务器文件具有正确的扩展名(Python 使用 .py,Node.js 使用 .js)
# Relative path
uv run client.py ./server/weather.py

# Absolute path
uv run client.py /Users/username/projects/mcp-server/weather.py

# Windows path (either format works)
uv run client.py C:/projects/mcp-server/weather.py
uv run client.py C:\\projects\\mcp-server\\weather.py
响应时间
- 首次响应可能需要最多 30 秒
- 这是正常现象,期间会发生:
- 服务器初始化
- Claude 处理查询
- 执行工具
- 后续响应通常会更快
- 在初始等待期间不要中断进程
常见错误消息
如果看到:FileNotFoundError:检查服务器路径Connection refused:确保服务器正在运行且路径正确Tool execution failed:确认已设置工具所需的环境变量Timeout error:考虑在Client上提高read_timeout_seconds
你可以在此处找到本教程的完整代码。更新 在项目根目录创建 将 客户端将:
系统要求
开始之前,请确保你的系统满足以下要求:- Mac 或 Windows 计算机
- 已安装 Node.js 20 或更高版本
- 已安装最新版本的
npm - Anthropic API 密钥(Claude)
设置环境
首先,创建并设置项目:# Create project directory
mkdir mcp-client-typescript
cd mcp-client-typescript
# Initialize npm project
npm init -y
# Install dependencies
npm install @anthropic-ai/sdk @modelcontextprotocol/client dotenv
# Install dev dependencies
npm install -D @types/node typescript
# Create source file
touch index.ts
# Create project directory
md mcp-client-typescript
cd mcp-client-typescript

# Initialize npm project
npm init -y

# Install dependencies
npm install @anthropic-ai/sdk @modelcontextprotocol/client dotenv

# Install dev dependencies
npm install -D @types/node typescript

# Create source file
new-item index.ts
package.json,将 type 设置为 "module",并添加构建脚本:package.json
{
  "type": "module",
  "scripts": {
    "build": "tsc && chmod 755 build/index.js"
  }
}
tsconfig.json:tsconfig.json
{
  "compilerOptions": {
    "target": "ES2022",
    "module": "Node16",
    "moduleResolution": "Node16",
    "types": ["node"],
    "outDir": "./build",
    "rootDir": "./",
    "strict": true,
    "esModuleInterop": true,
    "skipLibCheck": true,
    "forceConsistentCasingInFileNames": true
  },
  "include": ["index.ts"],
  "exclude": ["node_modules"]
}
设置 API 密钥
你需要从 Anthropic Console 获取 Anthropic API 密钥。创建一个.env 文件来存储它:echo "ANTHROPIC_API_KEY=<your key here>" > .env
.env 添加到 .gitignore:echo ".env" >> .gitignore
请务必妥善保管你的
ANTHROPIC_API_KEY!创建客户端
基本客户端结构
首先,在index.ts 中设置导入项并创建基本客户端类:import { Anthropic } from "@anthropic-ai/sdk";
import {
MessageParam,
Tool,
} from "@anthropic-ai/sdk/resources/messages/messages.mjs";
import { Client } from "@modelcontextprotocol/client";
import { StdioClientTransport } from "@modelcontextprotocol/client/stdio";
import readline from "readline/promises";
import dotenv from "dotenv";
dotenv.config();
const ANTHROPIC_API_KEY = process.env.ANTHROPIC_API_KEY;
if (!ANTHROPIC_API_KEY) {
throw new Error("ANTHROPIC_API_KEY is not set");
}
class MCPClient {
private mcp: Client;
private anthropic: Anthropic;
private transport: StdioClientTransport | null = null;
private tools: Tool[] = [];
constructor() {
this.anthropic = new Anthropic({
apiKey: ANTHROPIC_API_KEY,
});
this.mcp = new Client({ name: "mcp-client-cli", version: "1.0.0" });
}
// methods will go here
}
服务器连接管理
接下来,实现连接到 MCP 服务器的方法:async connectToServer(serverScriptPath: string) {
try {
const isJs = serverScriptPath.endsWith(".js");
const isPy = serverScriptPath.endsWith(".py");
if (!isJs && !isPy) {
throw new Error("Server script must be a .js or .py file");
}
const command = isPy
? process.platform === "win32"
? "python"
: "python3"
: process.execPath;
this.transport = new StdioClientTransport({
command,
args: [serverScriptPath],
});
await this.mcp.connect(this.transport);
const toolsResult = await this.mcp.listTools();
this.tools = toolsResult.tools.map((tool) => {
return {
name: tool.name,
description: tool.description,
input_schema: tool.inputSchema,
};
});
console.log(
"Connected to server with tools:",
this.tools.map(({ name }) => name)
);
} catch (e) {
console.log("Failed to connect to MCP server: ", e);
throw e;
}
}
查询处理逻辑
现在,添加处理查询和处理工具调用的核心功能:async processQuery(query: string) {
const messages: MessageParam[] = [
{
role: "user",
content: query,
},
];
const response = await this.anthropic.messages.create({
model: "claude-opus-5",
max_tokens: 1000,
messages,
tools: this.tools,
});
const finalText = [];
for (const content of response.content) {
if (content.type === "text") {
finalText.push(content.text);
} else if (content.type === "tool_use") {
const toolName = content.name;
const toolArgs = content.input as { [x: string]: unknown } | undefined;
const result = await this.mcp.callTool({
name: toolName,
arguments: toolArgs,
});
finalText.push(
`[Calling tool ${toolName} with args ${JSON.stringify(toolArgs)}]`
);
messages.push({
role: "user",
content: result.content
.filter((block) => block.type === "text")
.map((block) => block.text)
.join("\n"),
});
const response = await this.anthropic.messages.create({
model: "claude-opus-5",
max_tokens: 1000,
messages,
});
finalText.push(
response.content[0].type === "text" ? response.content[0].text : ""
);
}
}
return finalText.join("\n");
}
交互式聊天界面
现在添加聊天循环和清理功能:async chatLoop() {
const rl = readline.createInterface({
input: process.stdin,
output: process.stdout,
});
try {
console.log("\nMCP Client Started!");
console.log("Type your queries or 'quit' to exit.");
while (true) {
const message = await rl.question("\nQuery: ");
if (message.toLowerCase() === "quit") {
break;
}
const response = await this.processQuery(message);
console.log("\n" + response);
}
} finally {
rl.close();
}
}
async cleanup() {
await this.mcp.close();
}
主入口
最后,添加主执行逻辑:async function main() {
if (process.argv.length < 3) {
console.log("Usage: node index.ts <path_to_server_script>");
return;
}
const mcpClient = new MCPClient();
try {
await mcpClient.connectToServer(process.argv[2]);
await mcpClient.chatLoop();
} catch (e) {
console.error("Error:", e);
await mcpClient.cleanup();
process.exit(1);
} finally {
await mcpClient.cleanup();
process.exit(0);
}
}
main();
运行客户端
要让客户端与任意 MCP 服务器一起运行:# Build TypeScript
npm run build
# Run the client
node build/index.js path/to/server.py # python server
node build/index.js path/to/build/index.js # node server
如果你正在继续完成服务器快速入门中的天气教程,你的命令可能类似于:
node build/index.js .../quickstart-resources/weather-server-typescript/build/index.js- 连接到指定的服务器
- 列出可用工具
- 启动交互式聊天会话,你可以在其中:
- 输入查询
- 查看工具执行情况
- 获取 Claude 的响应
工作原理
提交查询时:- 客户端从服务器获取可用工具列表
- 将你的查询连同工具描述一起发送给 Claude
- Claude 决定使用哪些工具(如果有)
- 客户端通过服务器执行请求的工具调用
- 将结果发送回 Claude
- Claude 提供自然语言响应
- 将响应显示给你
最佳实践
-
错误处理
- 使用 TypeScript 的类型系统来更好地检测错误
- 将工具调用包装在 try-catch 代码块中
- 提供有意义的错误消息
- 正确处理连接问题
-
安全性
- 将 API 密钥安全地存储在
.env中 - 验证服务器响应
- 谨慎处理工具权限
- 将 API 密钥安全地存储在
故障排除
服务器路径问题
- 仔细检查服务器脚本路径是否正确
- 如果相对路径不起作用,请使用绝对路径
- Windows 用户请确保在路径中使用正斜杠(/)或转义反斜杠(\)
- 确认服务器文件具有正确的扩展名(Node.js 使用 .js,Python 使用 .py)
# Relative path
node build/index.js ./server/build/index.js

# Absolute path
node build/index.js /Users/username/projects/mcp-server/build/index.js

# Windows path (either format works)
node build/index.js C:/projects/mcp-server/build/index.js
node build/index.js C:\\projects\\mcp-server\\build\\index.js
响应时间
- 首次响应可能需要最多 30 秒
- 这是正常现象,期间会发生:
- 服务器初始化
- Claude 处理查询
- 执行工具
- 后续响应通常会更快
- 在初始等待期间不要中断进程
常见错误消息
如果看到:Error: Cannot find module:检查构建文件夹,并确保 TypeScript 编译成功Connection refused:确保服务器正在运行且路径正确Tool execution failed:确认已设置工具所需的环境变量ANTHROPIC_API_KEY is not set:检查.env文件和环境变量TypeError:确保工具参数使用了正确的类型BadRequestError:确保你有足够的额度访问 Anthropic API
这是一个基于 Spring AI MCP 自动配置和启动器的快速入门示例。
如果想了解如何手动创建同步和异步 MCP 客户端,请参阅 Java SDK Client 文档。
系统要求
开始之前,请确保你的系统满足以下要求:- Java 17 或更高版本
- Maven 3.6+
- npx 包管理器
- Anthropic API 密钥(Claude)
- Brave Search API 密钥
设置环境
-
安装 npx(Node Package eXecute):
首先,确保安装了 npm,
然后运行:
npm install -g npx -
克隆代码仓库:
git clone https://github.com/spring-projects/spring-ai-examples.git cd model-context-protocol/web-search/brave-chatbot -
设置 API 密钥:
export ANTHROPIC_API_KEY='your-anthropic-api-key-here' export BRAVE_API_KEY='your-brave-api-key-here' -
构建应用程序:
./mvnw clean install -
使用 Maven 运行应用程序:
./mvnw spring-boot:run
请务必妥善保管你的
ANTHROPIC_API_KEY 和 BRAVE_API_KEY 密钥!工作原理
该应用程序通过以下几个组件,将 Spring AI 与 Brave Search MCP 服务器集成:MCP 客户端配置
- pom.xml 中的必需依赖:
<dependency>
    <groupId>org.springframework.ai</groupId>
    <artifactId>spring-ai-starter-mcp-client</artifactId>
</dependency>
<dependency>
    <groupId>org.springframework.ai</groupId>
    <artifactId>spring-ai-starter-model-anthropic</artifactId>
</dependency>
- 应用程序属性(application.yml):
spring:
  ai:
    mcp:
      client:
        enabled: true
        name: brave-search-client
        version: 1.0.0
        type: SYNC
        request-timeout: 20s
        stdio:
          root-change-notification: true
          servers-configuration: classpath:/mcp-servers-config.json
        toolcallback:
          enabled: true
    anthropic:
      api-key: ${ANTHROPIC_API_KEY}
spring-ai-starter-mcp-client,根据提供的服务器配置创建一个或多个 McpClient。
spring.ai.mcp.client.toolcallback.enabled=true 属性启用工具回调机制,该机制会自动将所有 MCP 工具注册为 Spring AI 工具。
默认情况下,此功能处于禁用状态。- MCP 服务器配置(
mcp-servers-config.json):
{
  "mcpServers": {
    "brave-search": {
      "command": "npx",
      "args": ["-y", "@modelcontextprotocol/server-brave-search"],
      "env": {
        "BRAVE_API_KEY": "<PUT YOUR BRAVE API KEY>"
      }
    }
  }
}
聊天实现
聊天机器人使用带有 MCP 工具集成的 Spring AIChatClient 实现:var chatClient = chatClientBuilder
.defaultSystem("You are useful assistant, expert in AI and Java.")
.defaultToolCallbacks((Object[]) mcpToolAdapter.toolCallbacks())
.defaultAdvisors(new MessageChatMemoryAdvisor(new InMemoryChatMemory()))
.build();
- 使用 Claude AI 模型进行自然语言理解
- 通过 MCP 集成 Brave Search,实现实时 Web 搜索能力
- 使用 InMemoryChatMemory 维护对话记忆
- 作为交互式命令行应用程序运行
构建和运行
./mvnw clean install
java -jar ./target/ai-mcp-brave-chatbot-0.0.1-SNAPSHOT.jar
./mvnw spring-boot:run
- 使用其内置知识回答问题
- 需要时使用 Brave Search 执行 Web 搜索
- 记住对话中之前消息的上下文
- 结合多个来源的信息,提供全面的回答
高级配置
MCP 客户端支持其他配置选项:- 通过
McpClientCustomizer<McpClient.SyncSpec>或McpClientCustomizer<McpClient.AsyncSpec>Bean 自定义客户端 - 使用多种传输类型的多个客户端:
STDIO和 Streamable HTTP - 与 Spring AI 工具执行框架集成
- 自动初始化客户端并管理其生命周期
spring.ai.mcp.client.streamable-http.connections.server1.url=http://localhost:8080
<dependency>
    <groupId>org.springframework.ai</groupId>
    <artifactId>spring-ai-starter-mcp-client-webflux</artifactId>
</dependency>
你可以在此处找到本教程的完整代码。现在,创建并设置项目:运行 验证所有内容是否设置正确:
也可以直接使用 Gradle 运行:客户端将:
系统要求
开始之前,请确保你的系统满足以下要求:- JDK 11 或更高版本
- Anthropic API 密钥(Claude)
设置环境
首先,如果尚未安装,请安装java 和 gradle。
你可以从官方 Oracle JDK 网站下载 java。
验证你的 java 安装:java --version
# Create a new directory for our project
mkdir kotlin-mcp-client
cd kotlin-mcp-client

# Initialize a new kotlin project
gradle init
# Create a new directory for our project
md kotlin-mcp-client
cd kotlin-mcp-client
# Initialize a new kotlin project
gradle init
gradle init 后,选择 Application 作为项目类型,选择 Kotlin 作为编程语言。或者,你可以使用 IntelliJ IDEA 项目向导创建 Kotlin 应用程序。创建项目后,将 build.gradle.kts 的内容替换为:build.gradle.kts
// Check latest versions at https://github.com/modelcontextprotocol/kotlin-sdk/releases
val mcpVersion = "0.9.0"
val ktorVersion = "3.2.3"
val anthropicVersion = "2.15.0"
val slf4jVersion = "2.0.17"

plugins {
    kotlin("jvm") version "2.3.20"
    id("com.gradleup.shadow") version "8.3.9"
    application
}

application {
    mainClass.set("MainKt")
}

dependencies {
    implementation("io.modelcontextprotocol:kotlin-sdk:$mcpVersion")
    implementation("io.ktor:ktor-client-cio:$ktorVersion")
    implementation("com.anthropic:anthropic-java:$anthropicVersion")
    implementation("org.slf4j:slf4j-simple:$slf4jVersion")
}
./gradlew build
设置 API 密钥
你需要从 Anthropic Console 获取 Anthropic API 密钥。设置 API 密钥:export ANTHROPIC_API_KEY='your-anthropic-api-key-here'
请务必妥善保管你的
ANTHROPIC_API_KEY!创建客户端
基本客户端结构
首先,创建基本客户端类:class MCPClient(apiKey: String) : AutoCloseable {
private val anthropic = AnthropicOkHttpClient.builder()
.apiKey(apiKey)
.build()
private val mcp: Client = Client(
clientInfo = Implementation(name = "mcp-client-cli", version = "1.0.0")
)
private var serverProcess: Process? = null
private lateinit var tools: List<ToolUnion>
// methods will go here
override fun close() {
runBlocking {
mcp.close()
}
serverProcess?.destroy()
anthropic.close()
}
}
服务器连接管理
接下来,实现连接到 MCP 服务器的方法:suspend fun connectToServer(serverScriptPath: String) {
val command = buildList {
when (serverScriptPath.substringAfterLast(".")) {
"js" -> add("node")
"py" -> add(if (System.getProperty("os.name").lowercase().contains("win")) "python" else "python3")
"jar" -> addAll(listOf("java", "-jar"))
else -> throw IllegalArgumentException("Server script must be a .js, .py or .jar file")
}
add(serverScriptPath)
}
val process = ProcessBuilder(command).start()
serverProcess = process
val transport = StdioClientTransport(
input = process.inputStream.asSource().buffered(),
output = process.outputStream.asSink().buffered(),
)
mcp.connect(transport)
val toolsResult = mcp.listTools()
tools = toolsResult.tools.map { tool ->
ToolUnion.ofTool(
Tool.builder()
.name(tool.name)
.description(tool.description ?: "")
.inputSchema(
Tool.InputSchema.builder()
.type(JsonValue.from(tool.inputSchema.type))
.properties(tool.inputSchema.properties?.toJsonValue() ?: EmptyJsonObject.toJsonValue())
.putAdditionalProperty("required", JsonValue.from(tool.inputSchema.required))
.build(),
)
.build(),
)
}
println("Connected to server with tools: ${tools.joinToString(", ") { it.tool().get().name() }}")
}
JsonObject.toJsonValue() helper
JsonObject.toJsonValue() helper
此辅助函数使用 Jackson 将 kotlinx.serialization
JsonObject 转换为 Anthropic SDK JsonValue:private fun JsonObject.toJsonValue(): JsonValue {
val mapper = ObjectMapper()
val node = mapper.readTree(this.toString())
return JsonValue.fromJsonNode(node)
}
查询处理逻辑
现在,添加处理查询和处理工具调用的核心功能:suspend fun processQuery(query: String): String {
val messages = mutableListOf(
MessageParam.builder()
.role(MessageParam.Role.USER)
.content(query)
.build(),
)
val response = anthropic.messages().create(
MessageCreateParams.builder()
.model("claude-opus-5")
.maxTokens(1024)
.messages(messages)
.tools(tools)
.build(),
)
val finalText = mutableListOf<String>()
response.content().forEach { content ->
when {
content.isText() -> finalText.add(content.text().get().text())
content.isToolUse() -> {
val toolName = content.toolUse().get().name()
val toolArgs =
content.toolUse().get()._input().convert(object : TypeReference<Map<String, JsonValue>>() {})
val result = mcp.callTool(
name = toolName,
arguments = toolArgs ?: emptyMap(),
)
finalText.add("[Calling tool $toolName with args $toolArgs]")
messages.add(
MessageParam.builder()
.role(MessageParam.Role.USER)
.content(
result.content
.filterIsInstance<TextContent>()
.joinToString("\n") { it.text }
)
.build(),
)
val aiResponse = anthropic.messages().create(
MessageCreateParams.builder()
.model("claude-opus-5")
.maxTokens(1024)
.messages(messages)
.build(),
)
finalText.add(aiResponse.content().first().text().get().text())
}
}
}
return finalText.joinToString("\n")
}
交互式聊天
添加聊天循环:suspend fun chatLoop() {
println("\nMCP Client Started!")
println("Type your queries or 'quit' to exit.")
while (true) {
print("\nQuery: ")
val message = readlnOrNull() ?: break
if (message.trim().lowercase() == "quit") break
try {
val response = processQuery(message)
println("\n$response")
} catch (e: Exception) {
println("\nError: ${e.message}")
}
}
}
主入口
最后,添加主执行函数:fun main(args: Array<String>) = runBlocking {
require(args.isNotEmpty()) { "Usage: java -jar <path> <path_to_server_script>" }
val apiKey = System.getenv("ANTHROPIC_API_KEY")
require(!apiKey.isNullOrBlank()) { "ANTHROPIC_API_KEY environment variable is not set" }
val client = MCPClient(apiKey)
client.use {
client.connectToServer(args.first())
client.chatLoop()
}
}
运行客户端
要让客户端与任意 MCP 服务器一起运行:./gradlew build
# Run the client
java -jar build/libs/kotlin-mcp-client-0.1.0-all.jar path/to/server.jar # JVM server
java -jar build/libs/kotlin-mcp-client-0.1.0-all.jar path/to/server.py # Python server
java -jar build/libs/kotlin-mcp-client-0.1.0-all.jar path/to/build/index.js # Node server
./gradlew run --args="path/to/server.jar"
如果你正在继续完成服务器快速入门中的天气教程,你的命令可能类似于:
java -jar build/libs/kotlin-mcp-client-0.1.0-all.jar .../samples/weather-stdio-server/build/libs/weather-stdio-server-0.1.0-all.jar- 连接到指定的服务器
- 列出可用工具
- 启动交互式聊天会话,你可以在其中:
- 输入查询
- 查看工具执行情况
- 获取 Claude 的响应
工作原理
以下是高级工作流示意图:提交查询时:- 客户端从服务器获取可用工具列表
- 将你的查询连同工具描述一起发送给 Claude
- Claude 决定使用哪些工具(如果有)
- 客户端通过服务器执行请求的工具调用
- 将结果发送回 Claude
- Claude 提供自然语言响应
- 将响应显示给你
最佳实践
-
错误处理
- 利用 Kotlin 的类型系统显式建模错误
- 在可能发生异常时,将外部工具和 API 调用包装在
try-catch代码块中 - 提供清晰且有意义的错误消息
- 正确处理网络超时和连接问题
-
安全性
- 将 API 密钥和机密安全地存储在
local.properties、环境变量或机密管理器中 - 验证所有外部响应,避免意外或不安全的数据使用
- 使用工具时谨慎处理权限和信任边界
- 将 API 密钥和机密安全地存储在
-
环境
- 通过环境变量设置
ANTHROPIC_API_KEY,而不是硬编码 - 在本地开发中使用带有适当
.gitignore规则的.env文件
- 通过环境变量设置
故障排除
服务器路径问题
- 仔细检查服务器脚本路径是否正确
- 如果相对路径不起作用,请使用绝对路径
- Windows 用户请确保在路径中使用正斜杠(/)或转义反斜杠(\)
- 确认已安装所需的运行时(Java 使用 java,Node.js 使用 npm,Python 使用 uv)
- 确认服务器文件具有正确的扩展名(Java 使用 .jar,Node.js 使用 .js,Python 使用 .py)
# Relative path
java -jar build/libs/client.jar ./server/build/libs/server.jar

# Absolute path
java -jar build/libs/client.jar /Users/username/projects/mcp-server/build/libs/server.jar

# Windows path (either format works)
java -jar build/libs/client.jar C:/projects/mcp-server/build/libs/server.jar
java -jar build/libs/client.jar C:\\projects\\mcp-server\\build\\libs\\server.jar
构建问题
- 使用
./gradlew build或./gradlew shadowJar(而不是./gradlew jar)来创建包含所有依赖项的 shadow JAR - 如果遇到 JDK 版本错误,请确保已安装的 JDK 版本与
build.gradle.kts中的jvmToolchain设置相匹配或更高
响应时间
- 首次响应可能需要最多 30 秒
- 这是正常现象,期间会发生:
- 服务器初始化
- Claude 处理查询
- 执行工具
- 后续响应通常会更快
- 在初始等待期间不要中断进程
常见错误消息
如果看到:Connection refused:确保服务器正在运行且路径正确Tool execution failed:确认已设置工具所需的环境变量ANTHROPIC_API_KEY is not set:检查环境变量
你可以在此处找到本教程的完整代码。然后,将所需依赖项添加到项目中:这创建了一个 .NET 控制台应用程序的基础,该应用程序可以从用户机密中读取 API 密钥。接下来,设置 MCP 客户端:将此函数添加到 这会创建一个 MCP 客户端,该客户端连接到作为命令行参数提供的服务器,然后列出所连接服务器中的可用工具。客户端将: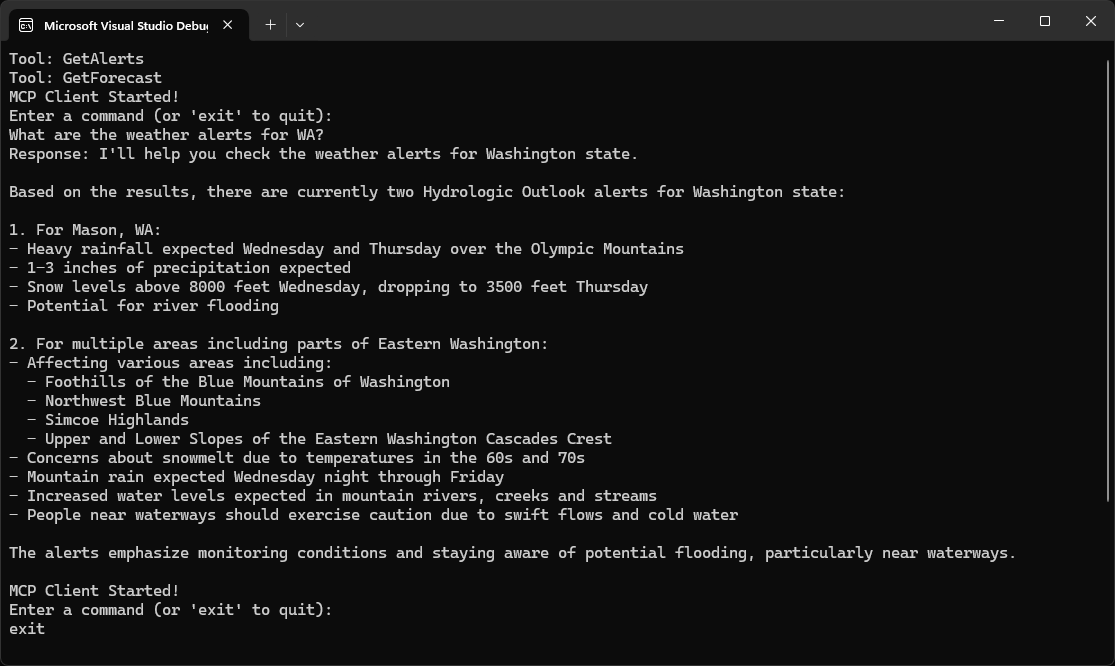
系统要求
开始之前,请确保你的系统满足以下要求:- .NET 8.0 或更高版本
- Anthropic API 密钥(Claude)
- Windows、Linux 或 macOS
设置环境
首先,创建一个新的 .NET 项目:dotnet new console -n QuickstartClient
cd QuickstartClient
dotnet add package ModelContextProtocol --prerelease
dotnet add package Anthropic.SDK
dotnet add package Microsoft.Extensions.Hosting
dotnet add package Microsoft.Extensions.AI
设置 API 密钥
你需要从 Anthropic Console 获取 Anthropic API 密钥。dotnet user-secrets init
dotnet user-secrets set "ANTHROPIC_API_KEY" "<your key here>"
创建客户端
基本客户端结构
首先,在Program.cs 文件中设置基本客户端类:using Anthropic.SDK;
using Microsoft.Extensions.AI;
using Microsoft.Extensions.Configuration;
using Microsoft.Extensions.Hosting;
using ModelContextProtocol.Client;
using ModelContextProtocol.Protocol.Transport;
var builder = Host.CreateApplicationBuilder(args);
builder.Configuration
.AddEnvironmentVariables()
.AddUserSecrets<Program>();
var (command, arguments) = GetCommandAndArguments(args);

var clientTransport = new StdioClientTransport(new()
{
    Name = "Demo Server",
    Command = command,
    Arguments = arguments,
});

await using var mcpClient = await McpClient.CreateAsync(clientTransport);

var tools = await mcpClient.ListToolsAsync();
foreach (var tool in tools)
{
    Console.WriteLine($"Connected to server with tools: {tool.Name}");
}
Program.cs 文件末尾:static (string command, string[] arguments) GetCommandAndArguments(string[] args)
{
return args switch
{
[var script] when script.EndsWith(".py") => ("python", args),
[var script] when script.EndsWith(".js") => ("node", args),
[var script] when Directory.Exists(script) || (File.Exists(script) && script.EndsWith(".csproj")) => ("dotnet", ["run", "--project", script, "--no-build"]),
_ => throw new NotSupportedException("An unsupported server script was provided. Supported scripts are .py, .js, or .csproj")
};
}
查询处理逻辑
现在,添加处理查询和处理工具调用的核心功能:using var anthropicClient = new AnthropicClient(new APIAuthentication(builder.Configuration["ANTHROPIC_API_KEY"]))
.Messages
.AsBuilder()
.UseFunctionInvocation()
.Build();
var options = new ChatOptions
{
MaxOutputTokens = 1000,
ModelId = "claude-opus-5",
Tools = [.. tools]
};
Console.ForegroundColor = ConsoleColor.Green;
Console.WriteLine("MCP Client Started!");
Console.ResetColor();
PromptForInput();
while(Console.ReadLine() is string query && !"exit".Equals(query, StringComparison.OrdinalIgnoreCase))
{
if (string.IsNullOrWhiteSpace(query))
{
PromptForInput();
continue;
}
await foreach (var message in anthropicClient.GetStreamingResponseAsync(query, options))
{
Console.Write(message);
}
Console.WriteLine();
PromptForInput();
}
static void PromptForInput()
{
Console.WriteLine("Enter a command (or 'exit' to quit):");
Console.ForegroundColor = ConsoleColor.Cyan;
Console.Write("> ");
Console.ResetColor();
}
关键组件说明
1. 客户端初始化
- 使用
McpClient.CreateAsync()初始化客户端,该方法设置传输类型以及运行服务器所需的命令
2. 服务器连接
- 支持 Python、Node.js 和 .NET 服务器
- 使用参数中指定的命令启动服务器
- 配置使用 stdio 与服务器通信
- 初始化会话和可用工具
3. 查询处理
- 使用 Microsoft.Extensions.AI 处理聊天客户端
- 配置
IChatClient使用自动工具(函数)调用 - 客户端读取用户输入并将其发送到服务器
- 服务器处理查询并返回响应
- 将响应显示给用户
运行客户端
要让客户端与任意 MCP 服务器一起运行:dotnet run -- path/to/server.csproj # dotnet server
dotnet run -- path/to/server.py # python server
dotnet run -- path/to/server.js # node server
如果你正在继续完成服务器快速入门中的天气教程,你的命令可能类似于:
dotnet run -- path/to/QuickstartWeatherServer- 连接到指定的服务器
- 列出可用工具
- 启动交互式聊天会话,你可以在其中:
- 输入查询
- 查看工具执行情况
- 获取 Claude 的响应
- 完成后退出会话
你可以在此处找到本教程的完整代码。将 你可以在此处找到完整的 客户端将:
系统要求
开始之前,请确保你的系统满足以下要求:- Mac 或 Windows 计算机
- 已安装 Ruby 3.2.0 或更高版本(Anthropic SDK 要求)
- Anthropic API 密钥(Claude)
设置环境
首先,创建一个新的 Ruby 项目:# Create project directory
mkdir mcp-client
cd mcp-client
# Create a Gemfile
bundle init
# Add required dependencies
bundle add anthropic dotenv mcp
# Create our main file
touch client.rb
# Create project directory
mkdir mcp-client
cd mcp-client

# Create a Gemfile
bundle init

# Add required dependencies
bundle add anthropic base64 dotenv mcp

# Create our main file
new-item client.rb
设置 API 密钥
你需要从 Anthropic Console 获取 Anthropic API 密钥。创建一个.env 文件来存储它:echo "ANTHROPIC_API_KEY=your-api-key-goes-here" > .env
.env 添加到 .gitignore:echo ".env" >> .gitignore
请务必妥善保管你的
ANTHROPIC_API_KEY!创建客户端
基本客户端结构
首先,设置 require 并创建基本客户端类:require "anthropic"
require "dotenv/load"
require "json"
require "mcp"
class MCPClient
ANTHROPIC_MODEL = "claude-opus-5"
def initialize
@mcp_client = nil
@transport = nil
@anthropic_client = nil
end
# methods will go here
end
服务器连接管理
接下来,实现连接到 MCP 服务器的方法:def connect_to_server(server_script_path)
command = case File.extname(server_script_path)
when ".rb"
"ruby"
when ".py"
"python3"
when ".js"
"node"
else
raise ArgumentError, "Server script must be a .rb, .py, or .js file."
end
@transport = MCP::Client::Stdio.new(command: command, args: [server_script_path])
@mcp_client = MCP::Client.new(transport: @transport)
@mcp_client.connect
tool_names = @mcp_client.tools.map(&:name)
puts "\nConnected to server with tools: #{tool_names}"
end
查询处理逻辑
现在,添加处理查询和处理工具调用的核心功能:private
def process_query(query)
messages = [{ role: "user", content: query }]
available_tools = @mcp_client.tools.map do |tool|
{ name: tool.name, description: tool.description, input_schema: tool.input_schema }
end
# Initial Claude API call.
response = chat(messages, tools: available_tools)
# Process response and handle tool calls.
if response.content.any?(Anthropic::Models::ToolUseBlock)
assistant_content = response.content.filter_map do |content_block|
case content_block
when Anthropic::Models::TextBlock
{ type: "text", text: content_block.text }
when Anthropic::Models::ToolUseBlock
{ type: "tool_use", id: content_block.id, name: content_block.name, input: content_block.input }
end
end
messages << { role: "assistant", content: assistant_content }
end
response.content.each_with_object([]) do |content, response_parts|
case content
when Anthropic::Models::TextBlock
response_parts << content.text
when Anthropic::Models::ToolUseBlock
# Execute tool call via MCP.
result = @mcp_client.call_tool(name: content.name, arguments: content.input)
response_parts << "[Calling tool #{content.name} with args #{content.input.to_json}]"
tool_result_content = result.dig("result", "content")
result_text = if tool_result_content.is_a?(Array)
tool_result_content.filter_map { |content_item| content_item["text"] }.join("\n")
else
tool_result_content.to_s
end
messages << {
role: "user",
content: [{
type: "tool_result",
tool_use_id: content.id,
content: result_text
}]
}
# Get next response from Claude.
response = chat(messages)
response.content.each do |content_block|
response_parts << content_block.text if content_block.is_a?(Anthropic::Models::TextBlock)
end
end
end.join("\n")
end
def chat(messages, tools: nil)
params = { model: ANTHROPIC_MODEL, max_tokens: 1000, messages: messages }
params[:tools] = tools if tools
anthropic_client.messages.create(**params)
end
def anthropic_client
@anthropic_client ||= Anthropic::Client.new(api_key: ENV["ANTHROPIC_API_KEY"])
end
交互式聊天界面
现在添加聊天循环和清理功能:def chat_loop
puts <<~MESSAGE
MCP Client Started!
Type your queries or 'quit' to exit.
MESSAGE
loop do
print "\nQuery: "
line = $stdin.gets
break if line.nil?
query = line.chomp.strip
break if query.downcase == "quit"
next if query.empty?
begin
response = process_query(query)
puts "\n#{response}"
rescue => e
puts "\nError: #{e.message}"
end
end
end
def cleanup
@transport&.close
end
主入口
最后,添加主执行逻辑:if ARGV.empty?
puts "Usage: ruby client.rb <path_to_server_script>"
exit 1
end
client = MCPClient.new
begin
client.connect_to_server(ARGV[0])
api_key = ENV["ANTHROPIC_API_KEY"]
if api_key.nil? || api_key.empty?
puts <<~MESSAGE
No ANTHROPIC_API_KEY found. To query these tools with Claude, set your API key:
export ANTHROPIC_API_KEY=your-api-key-here
MESSAGE
exit
end
client.chat_loop
rescue => e
puts "Error: #{e.message}"
exit 1
ensure
client.cleanup
end
client.rb 文件。关键组件说明
1. 客户端初始化
MCPClient类初始化时使用 nil 引用,以便延迟设置- Anthropic 客户端通过
anthropic_client方法延迟初始化 - 使用
dotenv从.env加载环境变量
2. 服务器连接
- 支持 Ruby、Python 和 Node.js 服务器
- 使用
File.extname确定服务器脚本类型 - 使用
MCP::Client::Stdio进行 stdio 传输 - 初始化 MCP 客户端并列出可用工具
3. 查询处理
- 将 MCP 工具映射为 Anthropic 工具格式(
name、description、input_schema) - 使用
Anthropic::Models::TextBlock和Anthropic::Models::ToolUseBlock进行模式匹配 - 在遍历工具调用之前构建一次 assistant 内容
- 通过
@mcp_client.call_tool执行工具调用 - 使用
chat辅助方法封装 Anthropic API 调用 - 使用
result.dig("result", "content")提取工具结果内容 - 将工具结果传回 Claude 以获取最终响应
4. 交互式界面
- 提供简单的命令行界面
- 处理用户输入并显示响应
- 跳过空查询
- 包含基本的错误处理
5. 资源管理
- 通过
begin…ensure正确清理传输 - 使用顶层
rescue进行错误处理 - 在连接服务器后验证 API 密钥
运行客户端
要让客户端与任意 MCP 服务器一起运行:bundle exec ruby client.rb path/to/server.rb # ruby server
bundle exec ruby client.rb path/to/server.py # python server
bundle exec ruby client.rb path/to/build/index.js # node server
如果你正在继续完成服务器快速入门中的天气教程,你的命令可能类似于:
bundle exec ruby client.rb /path/to/weather-server-ruby/weather.rb- 连接到指定的服务器
- 列出可用工具
- 启动交互式聊天会话,你可以在其中:
- 输入查询
- 查看工具执行情况
- 获取 Claude 的响应
工作原理
提交查询时:- 客户端从服务器获取可用工具列表
- 将你的查询连同工具描述一起发送给 Claude
- Claude 决定使用哪些工具(如果有)
- 客户端通过服务器执行请求的工具调用
- 将结果发送回 Claude
- Claude 提供自然语言响应
- 将响应显示给你
最佳实践
-
错误处理
- 将工具调用包装在
begin…rescue代码块中 - 提供有意义的错误消息
- 正确处理连接问题
- 将工具调用包装在
-
资源管理
- 完成后始终关闭传输
- 使用
begin…ensure进行正确清理 - 处理服务器断开连接的情况
-
安全性
- 将 API 密钥安全地存储在
.env中 - 验证服务器响应
- 谨慎处理工具权限
- 将 API 密钥安全地存储在
-
工具名称
- 可以根据此处指定的格式验证工具名称
- 如果工具名称符合指定格式,则 MCP 客户端不应因验证而失败
故障排除
服务器路径问题
- 仔细检查服务器脚本路径是否正确
- 如果相对路径不起作用,请使用绝对路径
- Windows 用户请确保在路径中使用正斜杠(/)或转义反斜杠(\)
- 确认服务器文件具有正确的扩展名(Python 使用 .py,Node.js 使用 .js,Ruby 使用 .rb)
# Relative path
bundle exec ruby client.rb ./server/weather.rb

# Absolute path
bundle exec ruby client.rb /Users/username/projects/mcp-server/weather.rb

# Windows path (either format works)
bundle exec ruby client.rb C:/projects/mcp-server/weather.rb
bundle exec ruby client.rb C:\\projects\\mcp-server\\weather.rb
响应时间
- 首次响应可能需要最多 30 秒
- 这是正常现象,期间会发生:
- 服务器初始化
- Claude 处理查询
- 执行工具
- 后续响应通常会更快
- 在初始等待期间不要中断进程
常见错误消息
如果看到:Errno::ENOENT:检查服务器路径,并确保命令(ruby、python3、node)可用Connection refused:确保服务器正在运行且路径正确Tool execution failed:确认已设置工具所需的环境变量Anthropic::Errors::AuthenticationError:检查.env文件中是否有有效的ANTHROPIC_API_KEY
你可以在此处找到本教程的完整代码。将 将 客户端会保存模型 API 客户端、活动的 MCP 会话以及所连接服务器公布的工具。此方法:MCP 和模型 API 使用相似的信息描述工具,但使用不同的 Rust 类型。这会将模型请求处理集中到一个位置,并在 API 请求失败时添加有用的上下文。该方法首先将用户查询和可用工具发送给 Claude。当 Claude 请求工具时,客户端通过 MCP 会话执行每个请求,将结果发送回 Claude,并收集最终文本响应。循环会持续接受查询,直到用户输入 入口会加载 在没有服务器命令的情况下直接运行 客户端将:如果找不到命令,请使用其绝对路径,或确认该命令在你的
系统要求
开始之前,请确保你的 Linux 系统满足以下要求:- 最新稳定版的 Rust 和 Cargo
- Anthropic API 密钥(Claude)
- 要连接的 Python、Node.js 或可执行 MCP 服务器
设置环境
首先,创建一个新的 Rust 项目:cargo new mcp-client-rust
cd mcp-client-rust
Cargo.toml 的内容替换为以下内容:Cargo.toml
[package]
name = "mcp-client-rust"
version = "0.1.0"
edition = "2024"

[dependencies]
anyhow = "1.0.100"
genai = "0.4.2"
rmcp = { version = "0.8.0", features = ["server", "client", "transport-io", "transport-child-process"] }
tokio = { version = "1.47.1", features = ["full"] }
tracing = "0.1.41"
tracing-subscriber = { version = "0.3", features = ["env-filter"] }
serde_json = "1.0.128"
dotenvy = "0.15.7"
reqwest = "0.12.23"
rmcp crate 提供 Rust MCP SDK 和子进程传输。此示例使用 genai crate 向 Claude 发送请求,并在模型请求中表示工具。设置 API 密钥
你需要从 Anthropic Console 获取 Anthropic API 密钥。创建一个.env 文件来存储它:echo "ANTHROPIC_API_KEY=your-api-key-goes-here" > .env
.env 添加到 .gitignore:echo ".env" >> .gitignore
请务必妥善保管你的
ANTHROPIC_API_KEY!创建客户端
打开src/main.rs,并按照以下各节逐步替换其内容。导入和客户端结构
首先,添加导入项、模型常量和基本客户端结构:use anyhow::{Context, Result, bail};
use genai::Client;
use genai::chat::{
ChatMessage, ChatRequest, ChatResponse, ContentPart, Tool as GenaiTool, ToolResponse,
};
use rmcp::model::{CallToolRequestParam, Tool as McpTool};
use rmcp::service::{RoleClient, RunningService, ServiceExt};
use rmcp::transport::TokioChildProcess;
use serde_json::Value;
use tokio::io::{self, AsyncBufReadExt, BufReader};
use tokio::process::Command;
const MODEL_ANTHROPIC: &str = "claude-opus-5";
struct MCPClient {
anthropic: Client,
session: Option<RunningService<RoleClient, ()>>,
tools: Vec<GenaiTool>,
}
客户端初始化
接下来,初始化模型客户端,并在没有 MCP 会话或工具的状态下启动:impl MCPClient {
fn new() -> Result<Self> {
Ok(MCPClient {
anthropic: Client::default(),
session: None,
tools: Vec::new(),
})
}
// Additional methods will go here.
}
genai::Client::default() 会在发送请求时读取 ANTHROPIC_API_KEY 环境变量。服务器连接管理
在impl MCPClient 代码块中添加此方法:async fn connect_to_server(&mut self, server_args: &[String]) -> Result<()> {
if self.session.is_some() {
bail!("Client is already connected to a server");
}
let mut command = Command::new(&server_args[0]);
command.args(&server_args[1..]);
let process = TokioChildProcess::new(command)
.with_context(|| format!("Failed to spawn server process for {:?}", server_args))?;
let session = ().serve(process).await?;
let rmcp_tools = session
.list_all_tools()
.await
.context("Unable to list tools from server")?;
let tool_names: Vec<String> = rmcp_tools
.iter()
.map(|tool| tool.name.to_string())
.collect();
println!("Connected to server with tools: {tool_names:?}");
self.tools = convert_tools(&rmcp_tools);
self.session = Some(session);
Ok(())
}
- 使用命令行提供的命令和参数,将服务器作为子进程启动
- 通过 stdio 建立 MCP 会话
- 列出服务器公布的所有工具
- 将这些工具转换为模型请求使用的格式
转换 MCP 工具
在impl MCPClient 代码块外添加此函数:fn convert_tools(tools: &[McpTool]) -> Vec<GenaiTool> {
tools
.iter()
.map(|tool| GenaiTool {
name: tool.name.to_string(),
description: tool.description.as_deref().map(str::to_string),
schema: Some(Value::Object(tool.input_schema.as_ref().clone())),
config: None,
})
.collect()
}
convert_tools 会将每个 MCP 工具的名称、描述和输入模式映射为 genai 工具定义。发送模型请求
在impl MCPClient 中添加此辅助方法:async fn request_model(&self, chat_req: &ChatRequest) -> Result<ChatResponse> {
let response = self
.anthropic
.exec_chat(MODEL_ANTHROPIC, chat_req.clone(), None)
.await
.context("Anthropic chat request failed")?;
Ok(response)
}
查询处理逻辑
现在,在impl MCPClient 中添加核心查询处理方法:async fn process_query(&mut self, query: &str) -> Result<String> {
let session = self
.session
.as_ref()
.context("Client is not connected to any server")?;
let mut messages = vec![ChatMessage::user(query)];
let mut final_text = Vec::new();
// Initial Claude API call with tools
let mut chat_req = ChatRequest::new(messages.clone()).with_tools(self.tools.clone());
let mut chat_rsp = self.request_model(&chat_req).await?;
// Process response content - collect text and handle tool calls
for text in chat_rsp.texts() {
final_text.push(text.to_string());
}
let tool_calls = chat_rsp.tool_calls();
if !tool_calls.is_empty() {
// Append assistant's response to message history
messages.push(ChatMessage::assistant(chat_rsp.content.clone()));
// Execute each tool call and collect responses
let mut tool_results = Vec::new();
for tool_call in tool_calls {
// Add information about the tool call to final text
let tool_args_str = serde_json::to_string(&tool_call.fn_arguments)
.unwrap_or_else(|_| "{}".to_string());
final_text.push(format!(
"[Calling tool {} with args {}]",
tool_call.fn_name, tool_args_str
));
// Query the MCP server
let tool_result = session
.call_tool(CallToolRequestParam {
name: tool_call.fn_name.clone().into(),
arguments: tool_call.fn_arguments.as_object().cloned(),
})
.await
.with_context(|| format!("Tool call {} failed", tool_call.fn_name))?;
let payload = serde_json::to_string(&tool_result)
.context("Failed to serialize tool result")?;
tool_results.push(ContentPart::ToolResponse(ToolResponse::new(
tool_call.call_id.clone(),
payload,
)));
}
// Append tool responses to message history
messages.push(ChatMessage::user(tool_results));
// Build the next request and query model
chat_req = ChatRequest::new(messages.clone());
chat_rsp = self.request_model(&chat_req).await?;
// Collect text from response
for text in chat_rsp.texts() {
final_text.push(text.to_string());
}
}
Ok(final_text.join("\n"))
}
交互式聊天界面
在impl MCPClient 中添加交互式终端循环:async fn chat_loop(&mut self) -> Result<()> {
println!("\nMCP Client Started!");
println!("Type your queries or 'quit' to exit.");
let mut stdin = BufReader::new(io::stdin());
let mut input = String::new();
loop {
print!("\nQuery: ");
std::io::Write::flush(&mut std::io::stdout())?;
input.clear();
if stdin.read_line(&mut input).await? == 0 {
break; // EOF
}
let query = input.trim();
if query.eq_ignore_ascii_case("quit") {
break;
}
if query.is_empty() {
continue;
}
match self.process_query(query).await {
Ok(response) => println!("\n{}", response),
Err(err) => println!("\nError: {}", err),
}
}
Ok(())
}
quit 或关闭标准输入。查询错误会被打印出来,但不会终止客户端。清理
在impl MCPClient 中添加此方法,以停止 MCP 会话和子进程:async fn cleanup(&mut self) -> Result<()> {
if let Some(session) = self.session.take() {
let _ = session.cancel().await;
}
Ok(())
}
主入口
最后,在impl MCPClient 代码块外添加异步入口:#[tokio::main]
async fn main() -> Result<()> {
dotenvy::dotenv().context("Failed to load env file")?;
let mut args = std::env::args();
let _ = args.next();
let server_args: Vec<String> = args.collect();
if server_args.is_empty() {
eprintln!("Usage: cargo run -- <server_script_or_binary> [args...]");
std::process::exit(1);
}
let mut client = MCPClient::new()?;
let result = async {
client.connect_to_server(&server_args).await?;
client.chat_loop().await
}
.await;
let cleanup_result = client.cleanup().await;
result?;
cleanup_result?;
Ok(())
}
.env,将其余所有命令行参数视为服务器命令,连接客户端,启动聊天循环,并确保在退出前完成清理。验证完整文件
运行客户端之前,确认src/main.rs 中的项目位于正确的作用域:new、connect_to_server、process_query、request_model、chat_loop和cleanup都是单个impl MCPClient代码块中的方法main和convert_tools是impl MCPClient代码块外的函数
src/main.rs 示例进行比较,然后检查其是否可以编译:cargo fmt --check
cargo check
运行客户端
使用cargo run --,后面跟上通常用于启动 MCP 服务器的命令:# Python server
cargo run -- python path/to/server.py
# Node.js server
cargo run -- node path/to/build/index.js
# Executable server
cargo run -- path/to/server-binary
cargo run 会打印用法消息并退出。如果你正在继续完成服务器快速入门中的天气教程,请先构建服务器,然后运行类似以下的命令:
cargo run -- ../weather-server-rust/target/debug/weather- 启动并连接到指定的 MCP 服务器
- 列出该服务器提供的工具
- 启动交互式聊天会话,你可以在其中:
- 输入查询
- 查看工具执行情况
- 获取 Claude 的响应
工作原理
提交查询时:- 客户端将你的查询和服务器的可用工具发送给 Claude
- Claude 决定使用哪些工具(如果有)
- 客户端通过 MCP 会话执行请求的工具
- 将工具结果发送回 Claude
- Claude 提供自然语言响应
- 在终端中显示响应
最佳实践
-
错误处理
- 在进程、MCP、模型 API 和序列化边界处为错误添加上下文
- 报告单个查询错误,但不要终止交互式会话
- 运行服务器前验证服务器命令
-
资源管理
- 清理期间始终取消 MCP 会话
- 确保即使连接或聊天循环操作失败也会运行清理
- 活动会话期间避免启动第二个服务器
-
安全性
- 将 API 密钥安全地存储在
.env中 - 在允许模型驱动调用之前检查服务器公开的工具
- 仅连接到你信任的服务器和可执行命令
- 将 API 密钥安全地存储在
故障排除
服务器命令问题
cargo run -- 后面的参数必须组成一个完整命令。解释执行的服务器脚本需要其运行时:# Correct
cargo run -- python ./server/weather.py
cargo run -- node ./server/build/index.js
# Incorrect: a Python script is not necessarily executable by itself
cargo run -- ./server/weather.py
PATH 中可用。环境文件问题
如果看到Failed to load env file,请确保运行客户端的目录中存在 .env。如果模型请求报告缺少 API 密钥,请确认 .env 包含:ANTHROPIC_API_KEY=your-api-key-goes-here
工具和响应错误
Unable to list tools from server:确认服务器成功启动并通过 stdio 通信Tool call ... failed:确认服务器工具所需的参数和环境变量Failed to serialize tool result:检查服务器响应中是否存在不受支持或格式错误的内容
后续步骤
示例服务器
查看我们的官方 MCP 服务器和实现集合